Resident Evil 2 Remake Best Weapon Agains G5
The boss battles of Resident Evil 2 have been completely revamped in RE2 Remake. Here's how you'll handle (and shell) these terrifying abominations.
In that location's more than only a few zombies infesting Raccoon City in Resident Evil ii Remake. Lickers, 1000-Embryos, and very large lizards are prowling effectually every corner of this fallen city. Between each major area, there'southward a titanic run across with a dominate — commonly the ever-evolving monster that'southward at the heart of the outbreak. These guys are all challenging, but they can be brought down with the right combination of wits and firepower.
Each boss has a particular weakness, and using the right strategy will help you lot relieve a whole agglomeration of ammo or healing items. Information technology helps to bring everything you've got to fight these big bads, and we're hither to help. Whether y'all're just curious and want a adept await at the strange creatures you lot'll see, or need some legit tips to accept them down, we've got you covered. Keep scrolling for private tips and tricks for each boss battle.
More Resident Evil two Remake guides on Gameranx:
- Resident Evil 2 Remake: ten Things Y'all Need To Know | Beginner'south Guide
- Resident Evil 2 Remake: How To Solve Every Puzzle | All Solutions Guide
- Resident Evil ii Remake: How To Unlock The True Ending | Endings Guide
- Resident Evil 2 Remake: How To Unlock Hunk, Tofu, Infinite Ammo & More | Bonus Guide
- Resident Evil 2 Remake: All Primal Items Locations | RPD Unlocking Guide
- Resident Evil 2 Remake: How To Get Every Gun | All Weapons Locations Guide
- Resident Evil ii Remake: All Weapon Upgrade Locations | Gun Parts Guide
- Resident Evil 2 Remake: All Pouch Locations | Inventory Expansion Guide
- Resident Evil 2 Remake: All Mr. Raccoons Locations | Collectibles Guide
- Resident Evil 2 Remake: How To Open Every Optional Lock & Safe | Lawmaking Solutions Guide
- Resident Evil 2 Remake: All Hint Movie Coil Locations | 'Treasure Hunter' Guide
How To Beat Every Boss | Boss Tips & Tricks Guide
[ Work-in-Progress: Check dorsum shortly for more than screenshots and video.]
One thousand [Stage 1]
The first course of William Birkin, codenamed "G", appears when Leon or Claire arrives in the Underground Facility. This version of Birkin, he's but partially transformed, with a monstrous right arm. He stalks y'all through the arena, attempting to swipe or stab y'all. If he corners you, he'll catch you for a deadly stab attack.
- General Tips:
- Aim for the center! Shoot Birkin's head / shoulder until the middle appears. If you damage G enough, he'll be stunned and the eye will appear. Save your best guns for the heart.
- Equip a Combat Knife to protect yourself confronting Birkin'southward grab attack. You can stab his arm and escape.
- If you're cornered, equip a grenade or flash grenade to stun him.
- There are iv item caches effectually the loonshit — you'll discover grenades, wink grenades, ammo, and health. Expect for K to be stunned, or set a wink grenade earlier collecting these items.
- Avert getting cornered! Weave through the passages and requite yourself plenty of room to run away.
G [Stage 2]
This shorter boxing occurs after restoring power in the Sewers. Once you solve the Chess Piece puzzle, you'll be ambushed past Yard. It claws through the ceiling, and then chases y'all to a construction platform. To defeat it, you lot'll need to aim for the eyes until information technology is stunned, then hit the switch to slam Birkin with a shipping container. Hit him twice, and the boxing information technology over.
- General Tips:
- In the first phase, avoid the holes Birkin has already clawed through. He'south much faster to attack. Continue sprinting, and stay abroad from the fire. Eventually, Birkin will break through and you lot'll be able to escape.
- Birkin is very ambitious once you reach the shipping container platform. Weave right when he attacks and right off-kilter with him to avoid his attacks. He's much faster, so give yourself plenty of room to maneuver.
- Aim for the eye once again! This time, it is always available. Blast it until Birkin falls to ane articulatio genus. He'll exist stunned long enough to hit the switch and slam a shipping container into him. If you do information technology twice, you'll win the battle.
- You can likewise save ammo and lure Birkin into the shipping container zone. Information technology takes a long time for the container to hit him, so hit the switch, rush to the opposite side, and then sprint back. Drop a grenade or wink grenade for a brusque stun. Just be conscientious — if you go hit by the shipping container, information technology's an instant death.
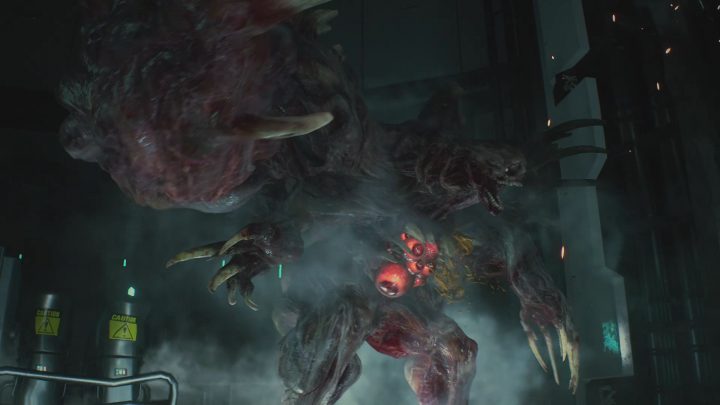
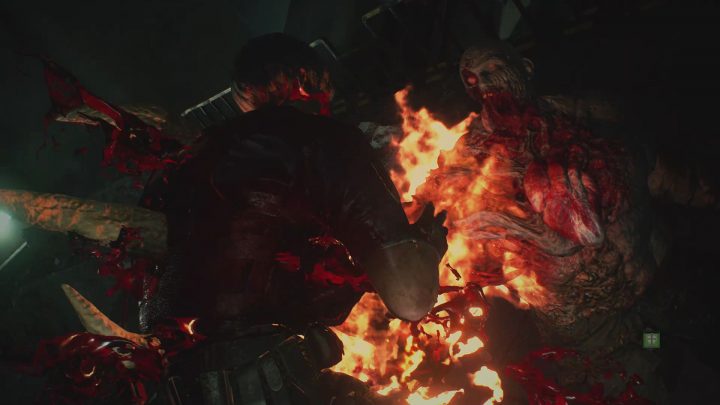
Chiliad [Stage three]
The third grade of G is a massive, powerful monster. He appears afterwards Leon / Claire recovers the 1000-Virus Sample. It'due south fast, potent, and can impale you very quickly if you aren't careful. Beware information technology's lunge assail, and be prepared to shoot out the iii eyes on its body. There are 2 eyes on the front, and ane on the back. Shoot all three to expose a weak point. Two rounds will expose the weak betoken permanently.
- General Tips:
- Birkin is incredibly aggressive in this fight. You'll very likely desire to bring at 1 or two full healing items your first time. In that location are more than healing items and ammo in the area.
- Employ precision weapons — the standard pistol — to poke out all iii eyes on Birkin. Shoot the small-scale middle on the front end and large eye first. Save the third middle for when Birkin attempts to throw debris ripped from the lab. That'due south your easiest chance to both stun him and have the eye out.
- If y'all shoot out all three eyes, his weak point volition appear. Utilize the Magnum, Shotgun, or any extremely powerful weapon to deliver straight damage to Birkin. Expose the weak point twice and employ powerful weapons, and the weak indicate will become exposed permanently.
- Once the weak point is permanently exposed, the boxing is well-nigh over. Just keep unloading ammo into the weak spot until Birkin is downed for adept.
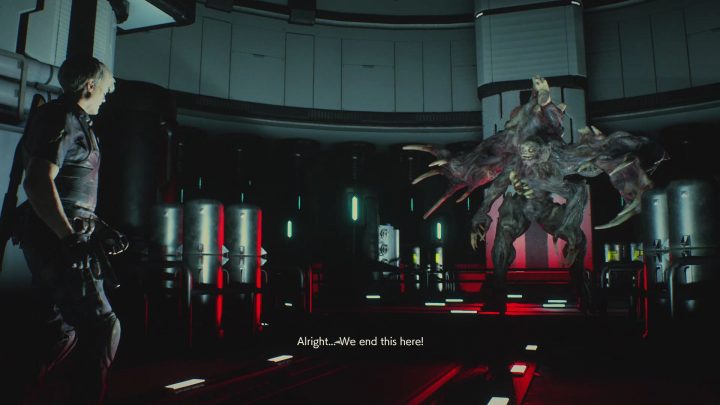
Super Tyrant
At the end of Leon A-Scenario, you'll face off confronting the terrifying Super Tyrant. This is the hardest boss in the game, then go into the fight prepared. Stock all the healing items and ammo you tin comport. You'll desire to bring at least ane flash grenade and save information technology for the cease of the fight. His head is still vulnerable, but the chirapsia heart is his true weak spot.
Notation: If you survive for ane:30 — Ada will automatically throw you the rocket launcher. As long as you lot survive long plenty, you don't even need to use any ammo. One shot is all you need.
- General Tips:
- Mix Bluish Herbs with Green+Cherry-red Herbs to fortify yourself in this fight. While fortified, Leon will run faster and have slightly less impairment from attacks.
- Aim for the middle! The heart is the weakest signal, and doing enough damage to the centre will crusade the Tyrant to flinch or get stunned.
- Every bit the fight progresses, droppings volition fall onto the elevator platform. Sprint and use the debris to ho-hum down Tyrant — you can put the debris between yourself and Tyrant to get in some rubber shots.
- Spotter out! When Tyrant attacks and destroys debris, it can damage you. Don't stand too shut to the rocks.
- Late in the fight, after a wall of droppings makes the arena smaller, the Tyrant volition curve down and charge his instakill assault. Do impairment to Tyrant to stun him, or throw a wink grenade to instantly interrupt his assail.
- Later interrupting this attack, he should be down for the count. Only a little more damage and Ada will throw Leon an Anti-Tank Rocket Launcher. Apply it to splatter the Super Tyrant and end the fight.
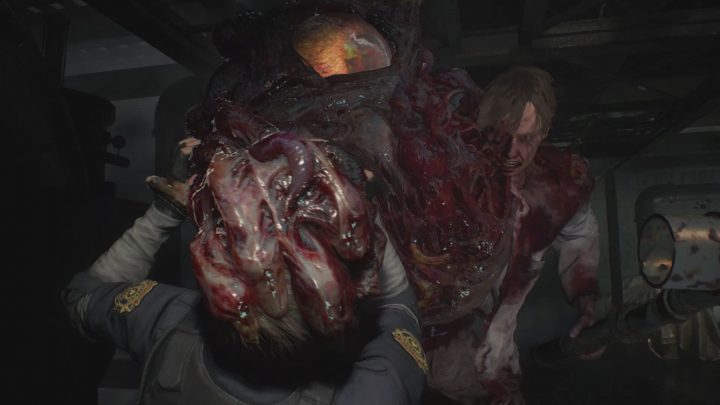
Grand [Stage 4]
Claire's concluding boss is a challenging, lengthy fight confronting a fast opponent. 1000 moves apace, and clings to the walls earlier swoop-bombing straight for you. Information technology volition as well charge beyond the room — y'all'll exist able to apply the railroad train auto in the center to cake its attacks. When it'due south near to lunge, running around the corner of the train car is a safe bet. The cluster of eyes on the monster's chest is his only weak point.
- General Tips:
- There's a minigun for y'all to collect here. Grab it and all the ammo you can. Yous'll need more the 400 shots in the minigun'due south magazine to bring downward Birkin.
- Only aim for the eyes on his chest. You can impairment him, merely it'due south very low compared to his weak spot. Don't brand my mistake and shoot him in the back with the minigun — it'due south meliorate to aim for the chest and exercise the maximum amount of damage.
- No matter what, this fight can feel like a slog. You might end up using almost all your ammo to bring Birkin down.
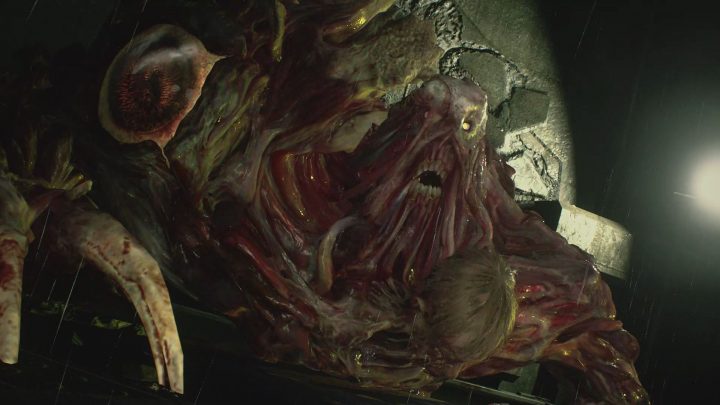
K [Stage 5]
The concluding stage of G merely appears at the stop of Leon or Claire's [B-Scenario] story. The all-encompassing mass of mankind that is Thousand slowly consumes the train car you're in. All you can exercise is back abroad and hibernate against the dorsum wall, using every shot yous can confronting him. Attempt to be frugal, and aim for the mouth — when the eye appears, unleash everything yous've got into the eat to finally defeat Birkin and end the game for expert.
Source: https://gameranx.com/features/id/169137/article/resident-evil-2-remake-how-to-beat-every-boss-boss-tips-tricks-guide/
0 Response to "Resident Evil 2 Remake Best Weapon Agains G5"
Post a Comment